Sunday, November 15, 2009
Tuesday, October 20, 2009
The Bates Way
This is part of the way that we do things...just so everyone knows. The bathroom is completely torn apart. The plumber was supposed to bring the new bath tub last week. He finally brought it today and it was the wrong size. Nothing can go on until we get that in...so we put it on hold over the weekend and decided to clean the house. While we were cleaning we decided to go to IKEA and get some curtains to act as closet doors. Well, after we bought some we decided to finish cleaning out the rooms and it ended up being a good time to pull out the carpet and put in the flooring. and that made it possible to repaint the room. So after we decided to clean the house over the weekend we ended up with everything out of Jessi's room and spread around the house, with only a couple of places left to sit and a weeks worth of project to get working on! And that, ladies and gentelmen, is how WE roll!
Wednesday, October 7, 2009
When to call a plumber
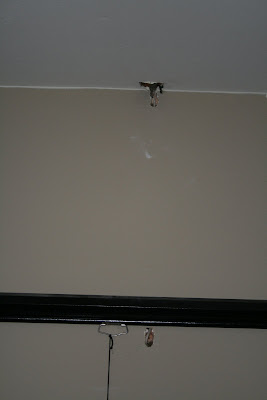
So, there are a few lessons to be learned in my first remodel. Number one...prepare to be over budget. I got part of the tile off and realized I was going to have to go down to the studs. Which is going to cost extra...then I tried my hand at plumbing.  This first picture is an example of what my work looked like after about 4 hours of trying to solder and one full day (and night) without water. You will notice that the copper no longer looks like copper and the whole thing looks a little amateurish to say the least.

The next picture is what happens when you call a plumber over, because you realize you are way out of your league. You will notice that the copper looks like copper and the brass looks like brass and the whole thing is really pretty. Some times you just have to know when to call in the pros!
Thursday, October 1, 2009
The mother of all projects...so far
So Jessi and I have made a goal. We want to have the bathroom done by the time our families get together for Thanksgiving. There is only one problem...neither of us have ever re-done a bathroom. Oh yeah, and we are limited on funds so we have to do the majority of the work ourselves. Today I got started with a little demolition. And let me say this...if the demolition is the easy part, then we may have bitten off more than we can chew! After about five hours, I can not swing my arm anymore and it hurts to make a fist. But this is how far the first day brought us and I will keep adding pics as we go along. The first three are before or as I like to call it, early in the afternoon
Monday, June 22, 2009
Fan update!
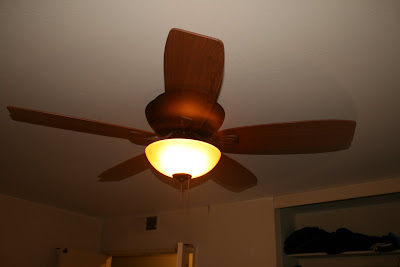
Well, I finally got the courage up to try and install a fan box in the vaulted ceiling living room. It was another two day project, but when it was done, all of a sudden the house is more livable in the heat. I had to cut two additional holes in the drywall to get the fan in. One where the ceiling meets the wall to get the wire going down and the other in the wall just below the projector screen. Apparently they put two by fours in the walls for some unknown reason. But oh well, it went in and the fan went up. But I have to take at least part of the fan back to Home Depot as the lights don't work. I troubleshot it as far as i could and it seems that I just need the bottom piece but we will see. I will probably have to take the whole thing down and return it. Here are some pics. If you look at the one with the fan you might notice that we are going to try to put up some crown moulding...should be an exercise in patience!

Sunday, June 7, 2009
Ceiling Fan part 2
So two days later...

You can kind of tell that they are moving. That's right, we went from a flat ceiling to a working fan in just 2 days!!! Everything today went pretty normal for hanging a fan. I did put it together wrong at first and had to take it apart to stop one of the wires from touching the rotating part. But that was it. This was a big deal for us. It is something that we have wanted to do for a very long time and I never had the guts to get started. But now that it is done there is one more project in the house that I know we can do.
And the other best part is that it was going to cost us $300 per box to put in. That is not including the fan. It cost us about $150 to get this first one in, not including the fan, but now we have all of the tools and it should only cost about twenty bucks to put the other boxes in. So, by my count, learning to do it on our own will have saved us about $1100 by the time we are done. Pretty good right?
Ceiling fans
Yesterday Jessi and I made our first attempt at doing electrical work. I have to admit that I was a little intimidated. We decided to put in some ceiling fans to help offset the cost of running the air conditioner. Unfortunately this house was built in the 70's and the overhead light was not popular, so there is no electricity running to the ceiling, and no box to hang a fan on.
I have a very rudimentary understanding of electricity and circuits and the way that it should all work together, but I have a book. Being the kind of person who likes action, I immediately take off the plates that I think are going to be the ones that I have to change and start working...I should have read the book!
I spent the first hour or so just figuring out that I shouldn't have taken off one of the plates and the next half hour trying to remember where all the wires went. Having that part nailed down I went to the attic.
Living in Southern California means a couple of things: you can count on your cost of living being a little more than your neighboring states, you can go to the beach when you want, and you will never see snow! The important one to this story is the last. Because there is no snow there is no need to have a steep pitch to your roof. Which, in this case means you have virtually no room to move around in the attic. Add insulated ducting for your A/C and heat, and you spend the next hour and a half figuring out that there is virtually no way to get to that side of the house. Hoping that I was just too big, Jessi suited herself up for fiberglass protection and spent a good half hour figuring out that she too could not get to that side of the house.
So for those of you not doing the math, that is three and a half hours down and we have successfully, and correctly, removed one face plate.
We returned to the book and found out that there is a way to install an electrical box when you do not have attic access. And, joy of joys, it involves drilling holes. So I got out my trusty drill, and the new bits that I bought just for the occasion. We drilled three holes, cut the hole in the ceiling for the new electrical box, spent about fifteen minutes fishing the wire down to the hole and wa-la we now have four holes in our wall and a wire that isn't plugged into anything! We stopped at this point as Joe and Anita were coming over for lunch. Then we had plans for the evening so I put the one faceplate back on and flipped the electricity back on at the box. Now we have two working outlets and a light switch that has to stay in the "off" position or we blow the fuse...today should go more smoothly though, right?
Saturday, June 6, 2009
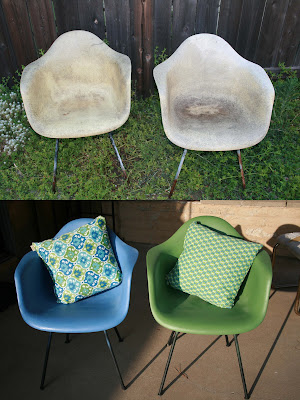
Chairs
Subscribe to:
Posts (Atom)

